


Note*: I'm using Yarn, so don't be confused if I said somewhere npm; both are the same package managers for Node JS. You don't need to learn it. Just follow the blog to understand some important fundamentals of the docker.*
What is Docker?
Docker is a container technology tool for creating and managing containers. If you're wondering what a container is, think of it as a package of code that includes all your project dependencies and libraries needed to run that code. Picture a picnic basket where you carry all the necessary items for a picnic and can share them with your friends.
Images vs Container
Images are the blueprints of your project, holding all your packages and dependencies. For example, they contain your Node.js environment and all your code. On the other hand, a container takes a copy of that Image and runs it in an isolated environment, such as your Node.js server. The exciting part is you can run multiple containers using the same Image, and they will always work the same until you change the Image.
Types of Images
We have two types of images: pre-built existing images from the Docker Hub and another type is a pre-built image on top of your custom image.
Let's see an example.
Here is my Folder Structure

I'm using Node.js. To follow along, pull it from here. First, create a Dockerfile at the root of your project.
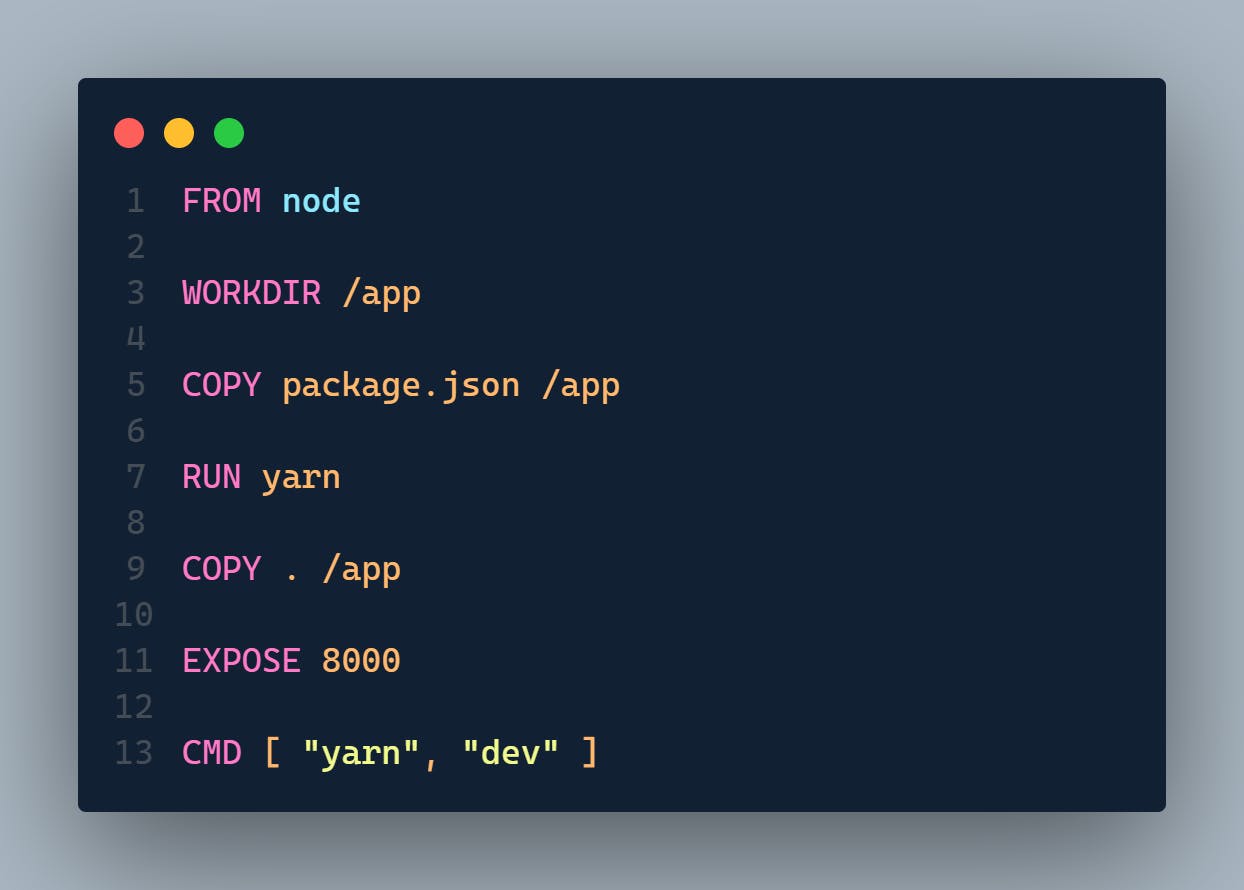
FROM: is used for a top-level pre-built image upon your custom: Os (Linux Distro) or Any runtime (Node.js). You can find anything on the Docker hub.
WORKDIR: Here, you can locate your Image folder, where all the code should be copied from your machine to the Image. Because your local machine file system and image file system are different, I have copied my files to the **/app** directory of the Image in the example.
COPY: This command lets you copy a file from your local machine to the Image. I have done this for the second time because of Docker Image Layer-based Architecture, which I will discuss in this section.

RUN: Here, you can specify which command you must run when the Image is being built.
EXPOSE: It exposes a port from your container. But it is optional. You can easily do this by adding a flag on the command line. We will talk about it later in this section.
CMD: This command allows you to specify which command you must run after creating an Image. For example, you can use this command to create a container from that Image and run something after building the container.
Understanding Image Layers
The Docker image works on a layer-based Architecture. First, after listing all the commands in the Dockerfile, you execute them individually when you run the [docker build .] command. This will build your Image one by one using the command layers you have given in the Dockerfile. In the Dockerfile, you have a command called [COPY. /app], which copies and pastes your local files into the image file system. Which is different from your local file system. By running that copy command, Docker will remember and cache your files until your local file changes and you rebuild the Image. Then, it will run other listed commands that need to be run after this copy command, which will also be cached.
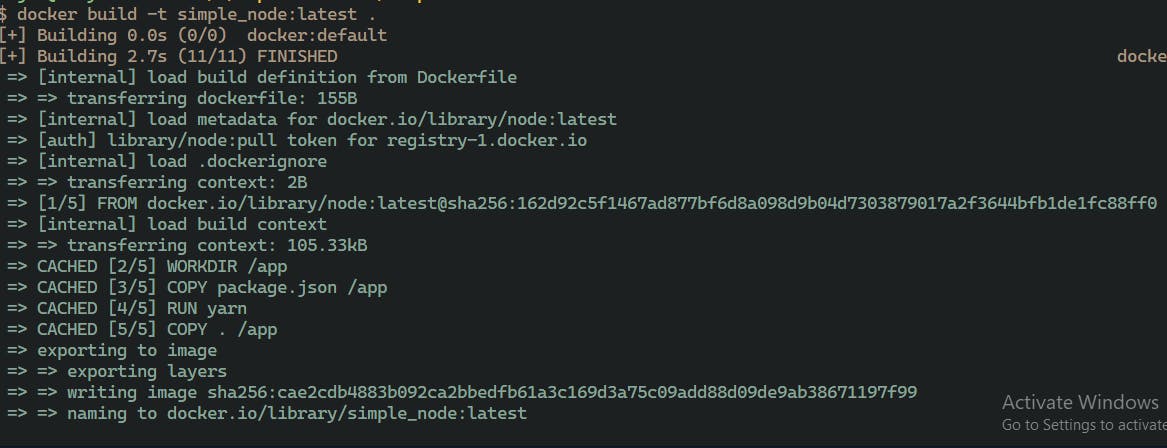
The above picture shows when I built the Image for the second time without changing my files. Instead, it will use the cache. It won't take as long as it took when I was building it for the first time. Here is a fun part: if I have to change something in my code and rebuild it, although I have only changed one file in the code base, it will re-run all the commands listed after copying my files because it knows something has changed. So the catch is if you wanted to optimise your commands, let's say you don't want to run npm install all the time because you haven't made any changes on the package.json file. You need to copy your package.json file before running the install commands. Then, you can copy all your other files from the code base, and then it won't run when you have just changed something in the code because You haven't installed any packages. Therefore, it comes from the cache. Here is an example :

The next part is coming soon...